
In this post, we will finally look at the working Precision Current Source. We will assemble the device and calibrate it using a 34465A bench multimeter. Finally, I got this project almost to the finish line. I will tell you what is remaining. But for now, I am happy with how this project turned out.
Precision Current Source
Specification
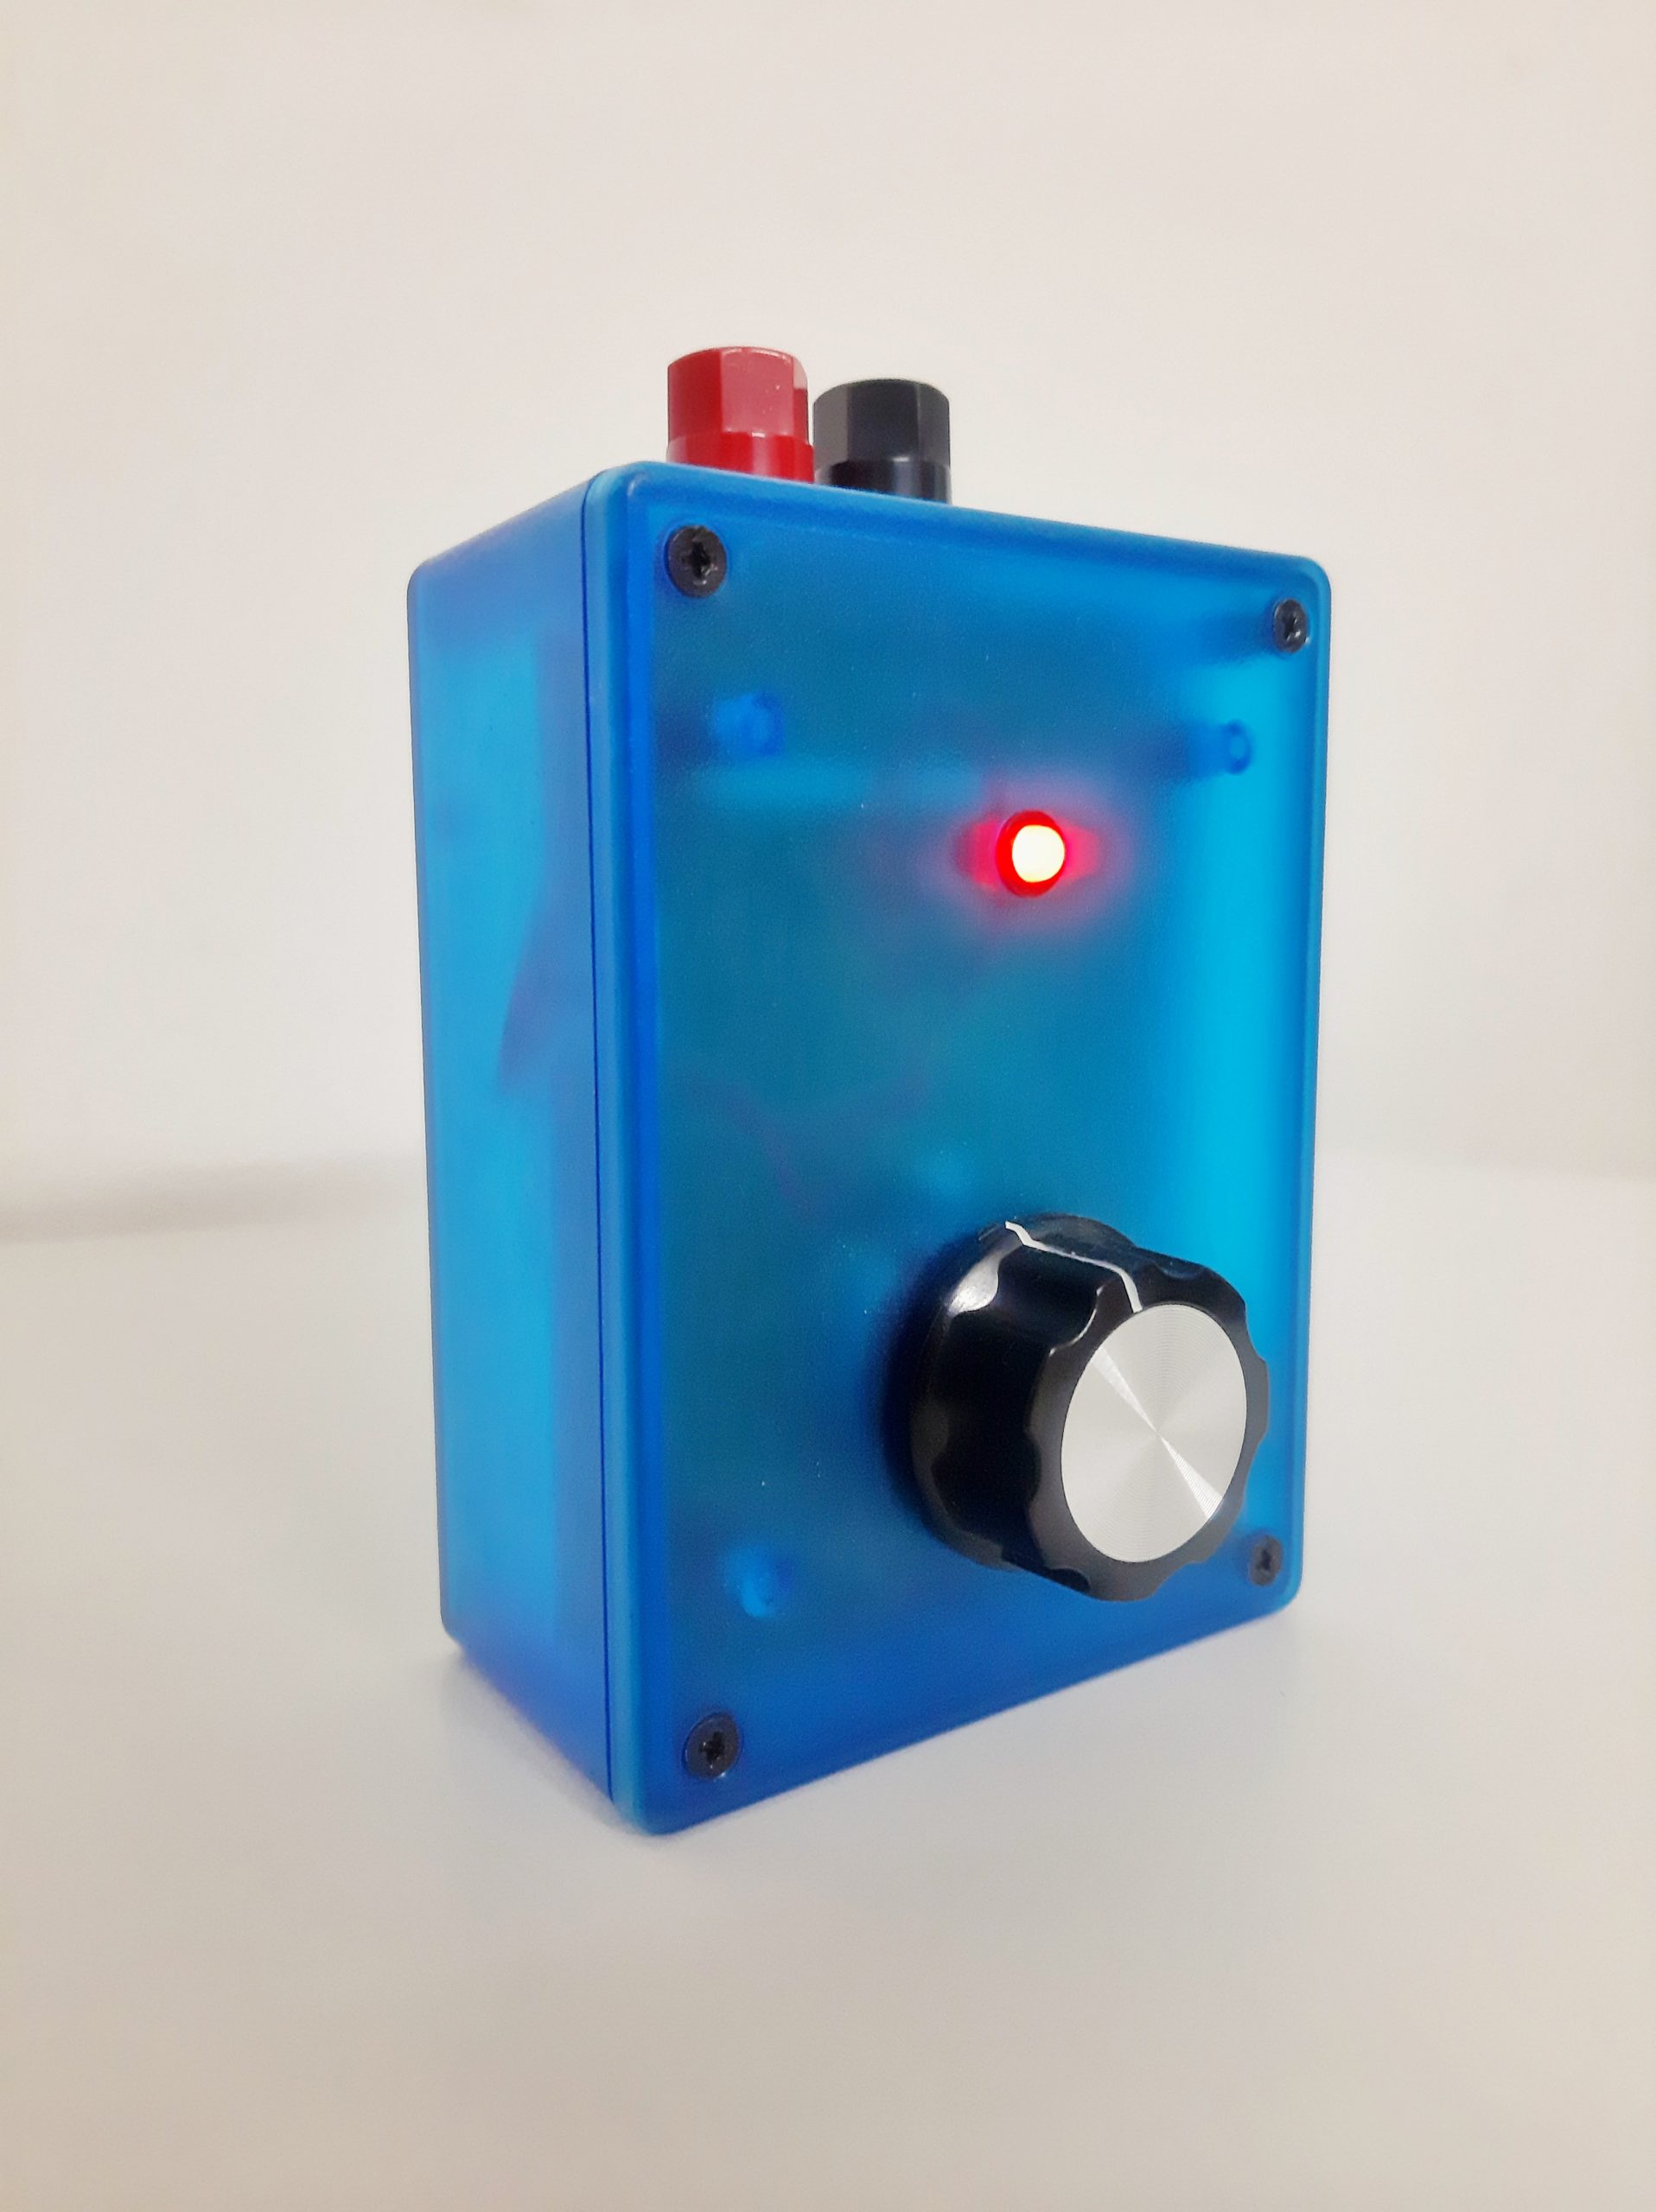
The device has three ranges 0.5mA, 1mA, 1.499mA (more about the last range later). It has an accuracy better than ±0.01%. The knob has four stops first is Off, the second is 0.5mA, then 1mA, and finally 1.499mA. We have up to 11V of headroom so it can handle the resistive load from 7.3kΩ to 22kΩ. By design, the device should have negligible temperature drift.
The device has an indicator LED with an option to turn it off for longer battery life. The battery life of the device can be between 14 Days to 60 Days of continuous usage. The battery life changes depending on the range it is operating and if the LED is working or not. The Constant Current source is completely floating and works off of three AA cells. I calculated the battery life considering Duracell AA alkaline cells. It has binding posts on the top with standard spacing between them.
Design
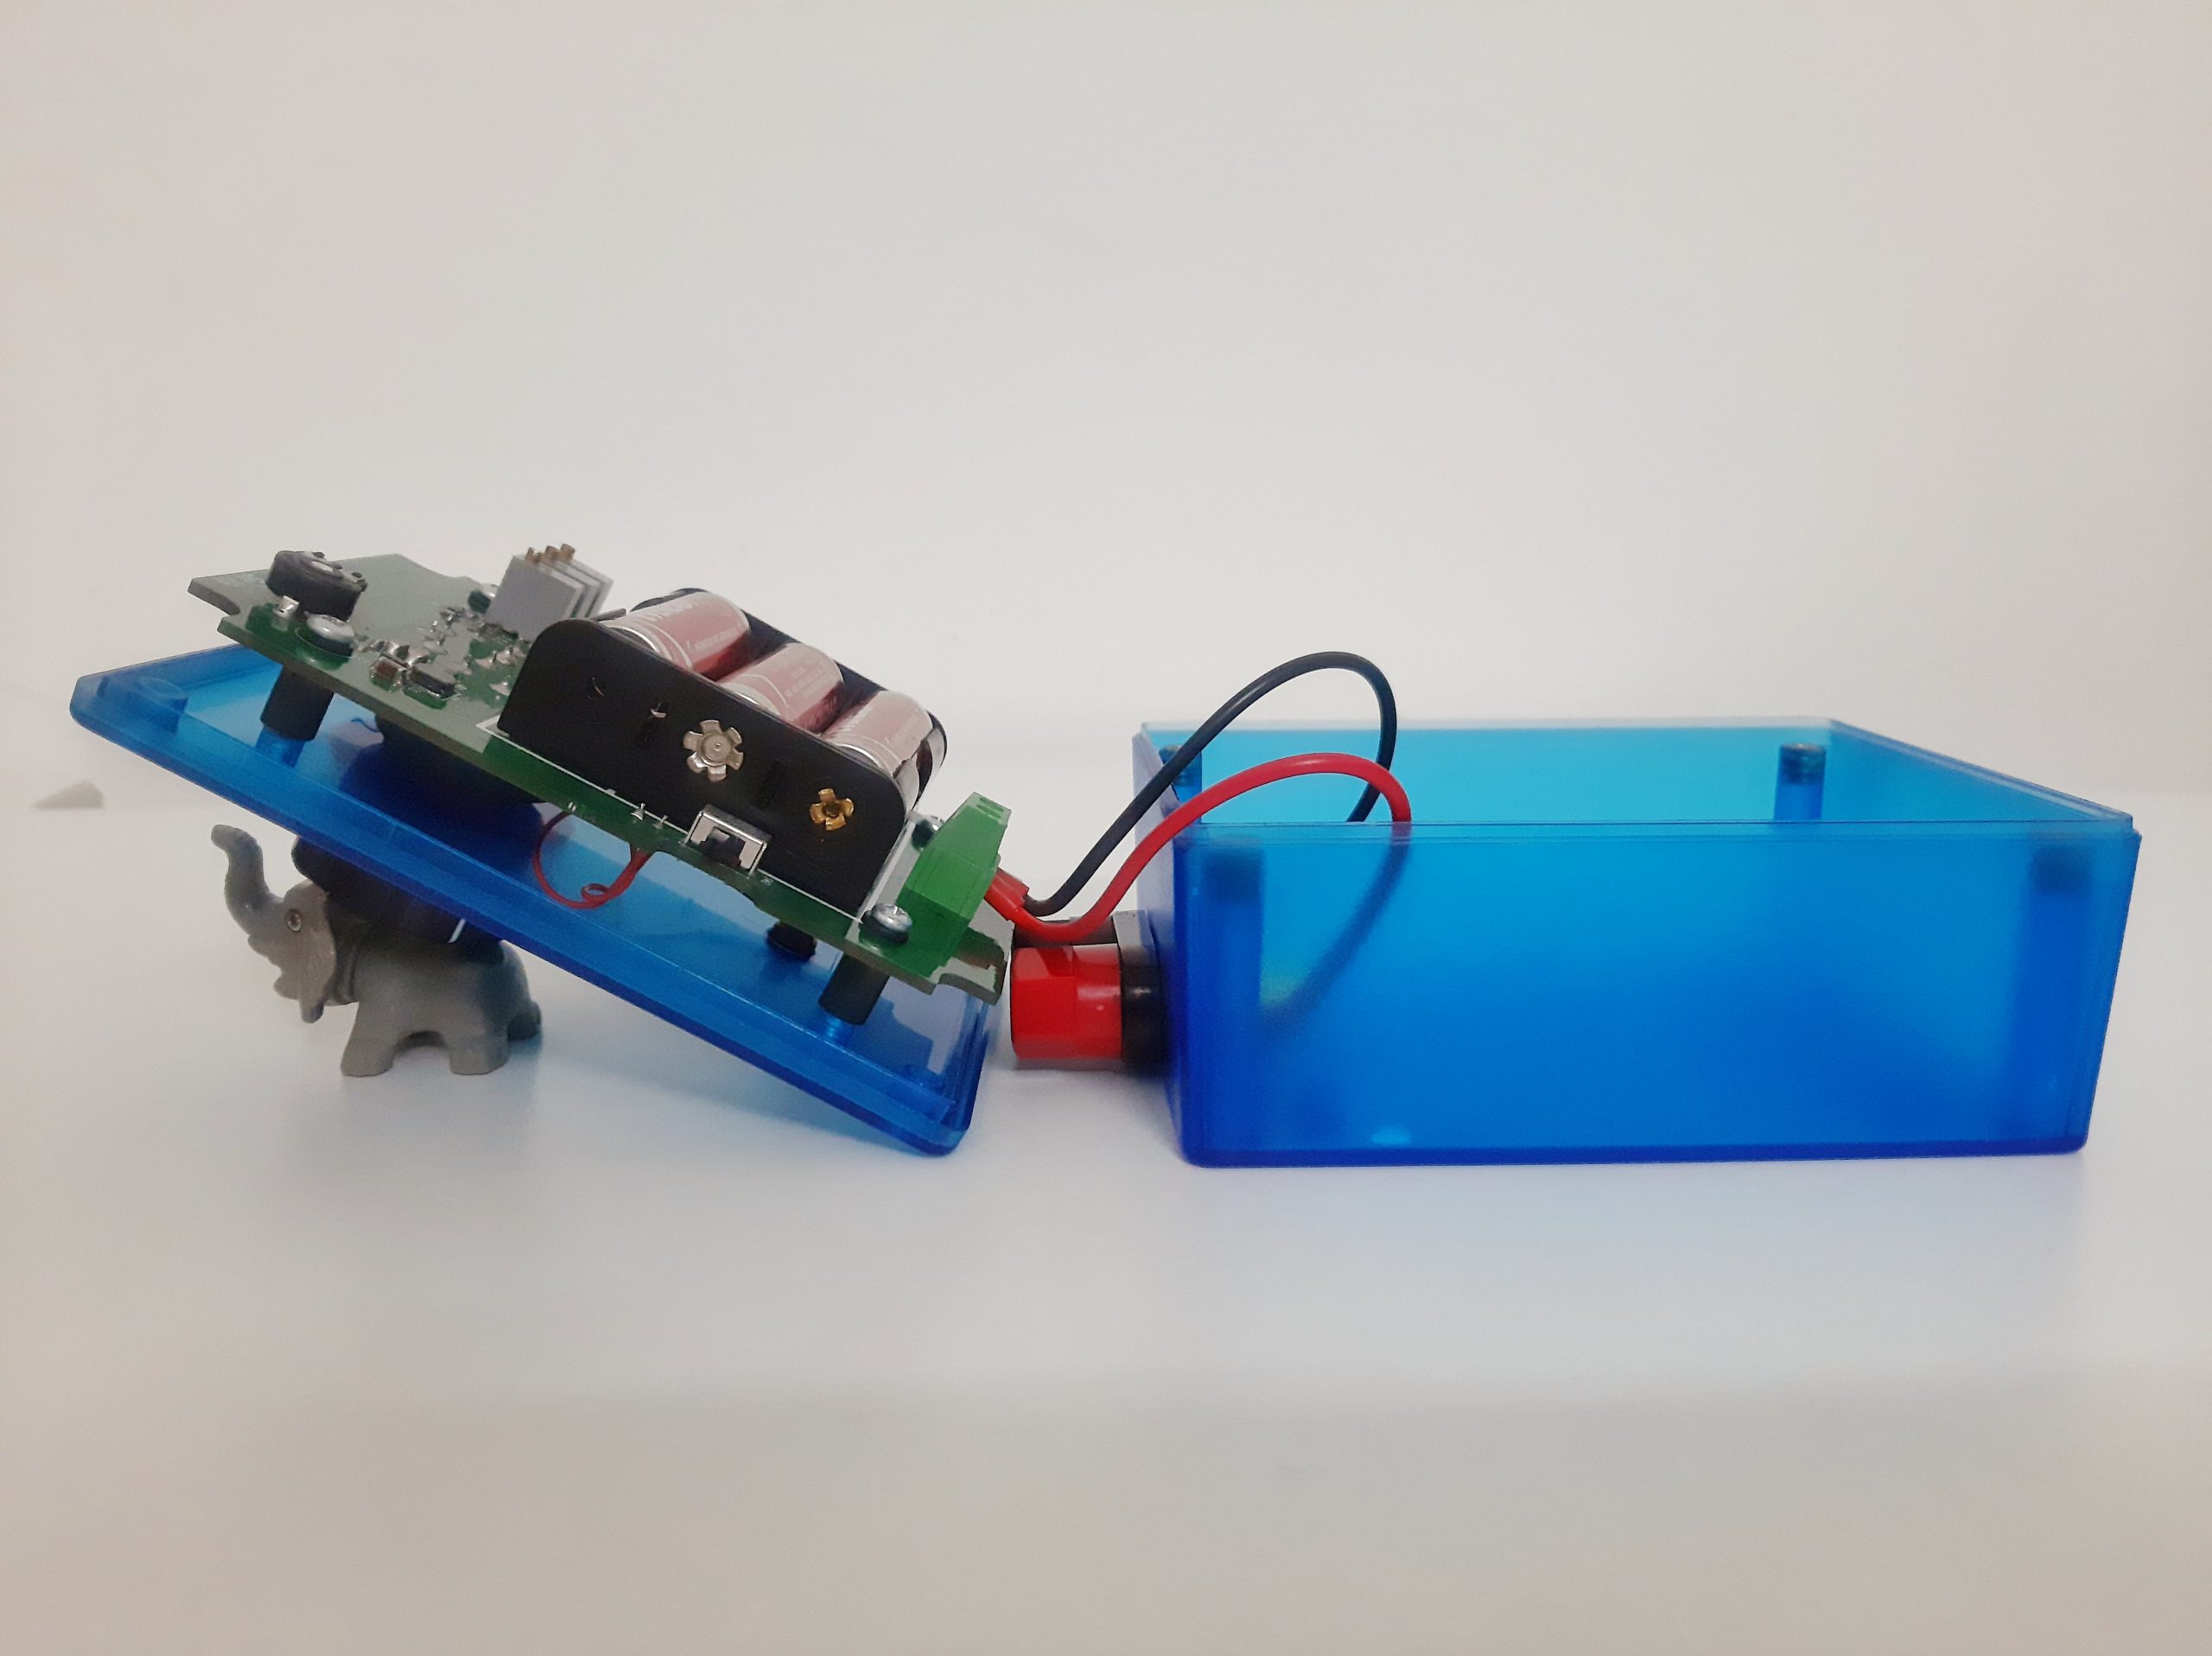
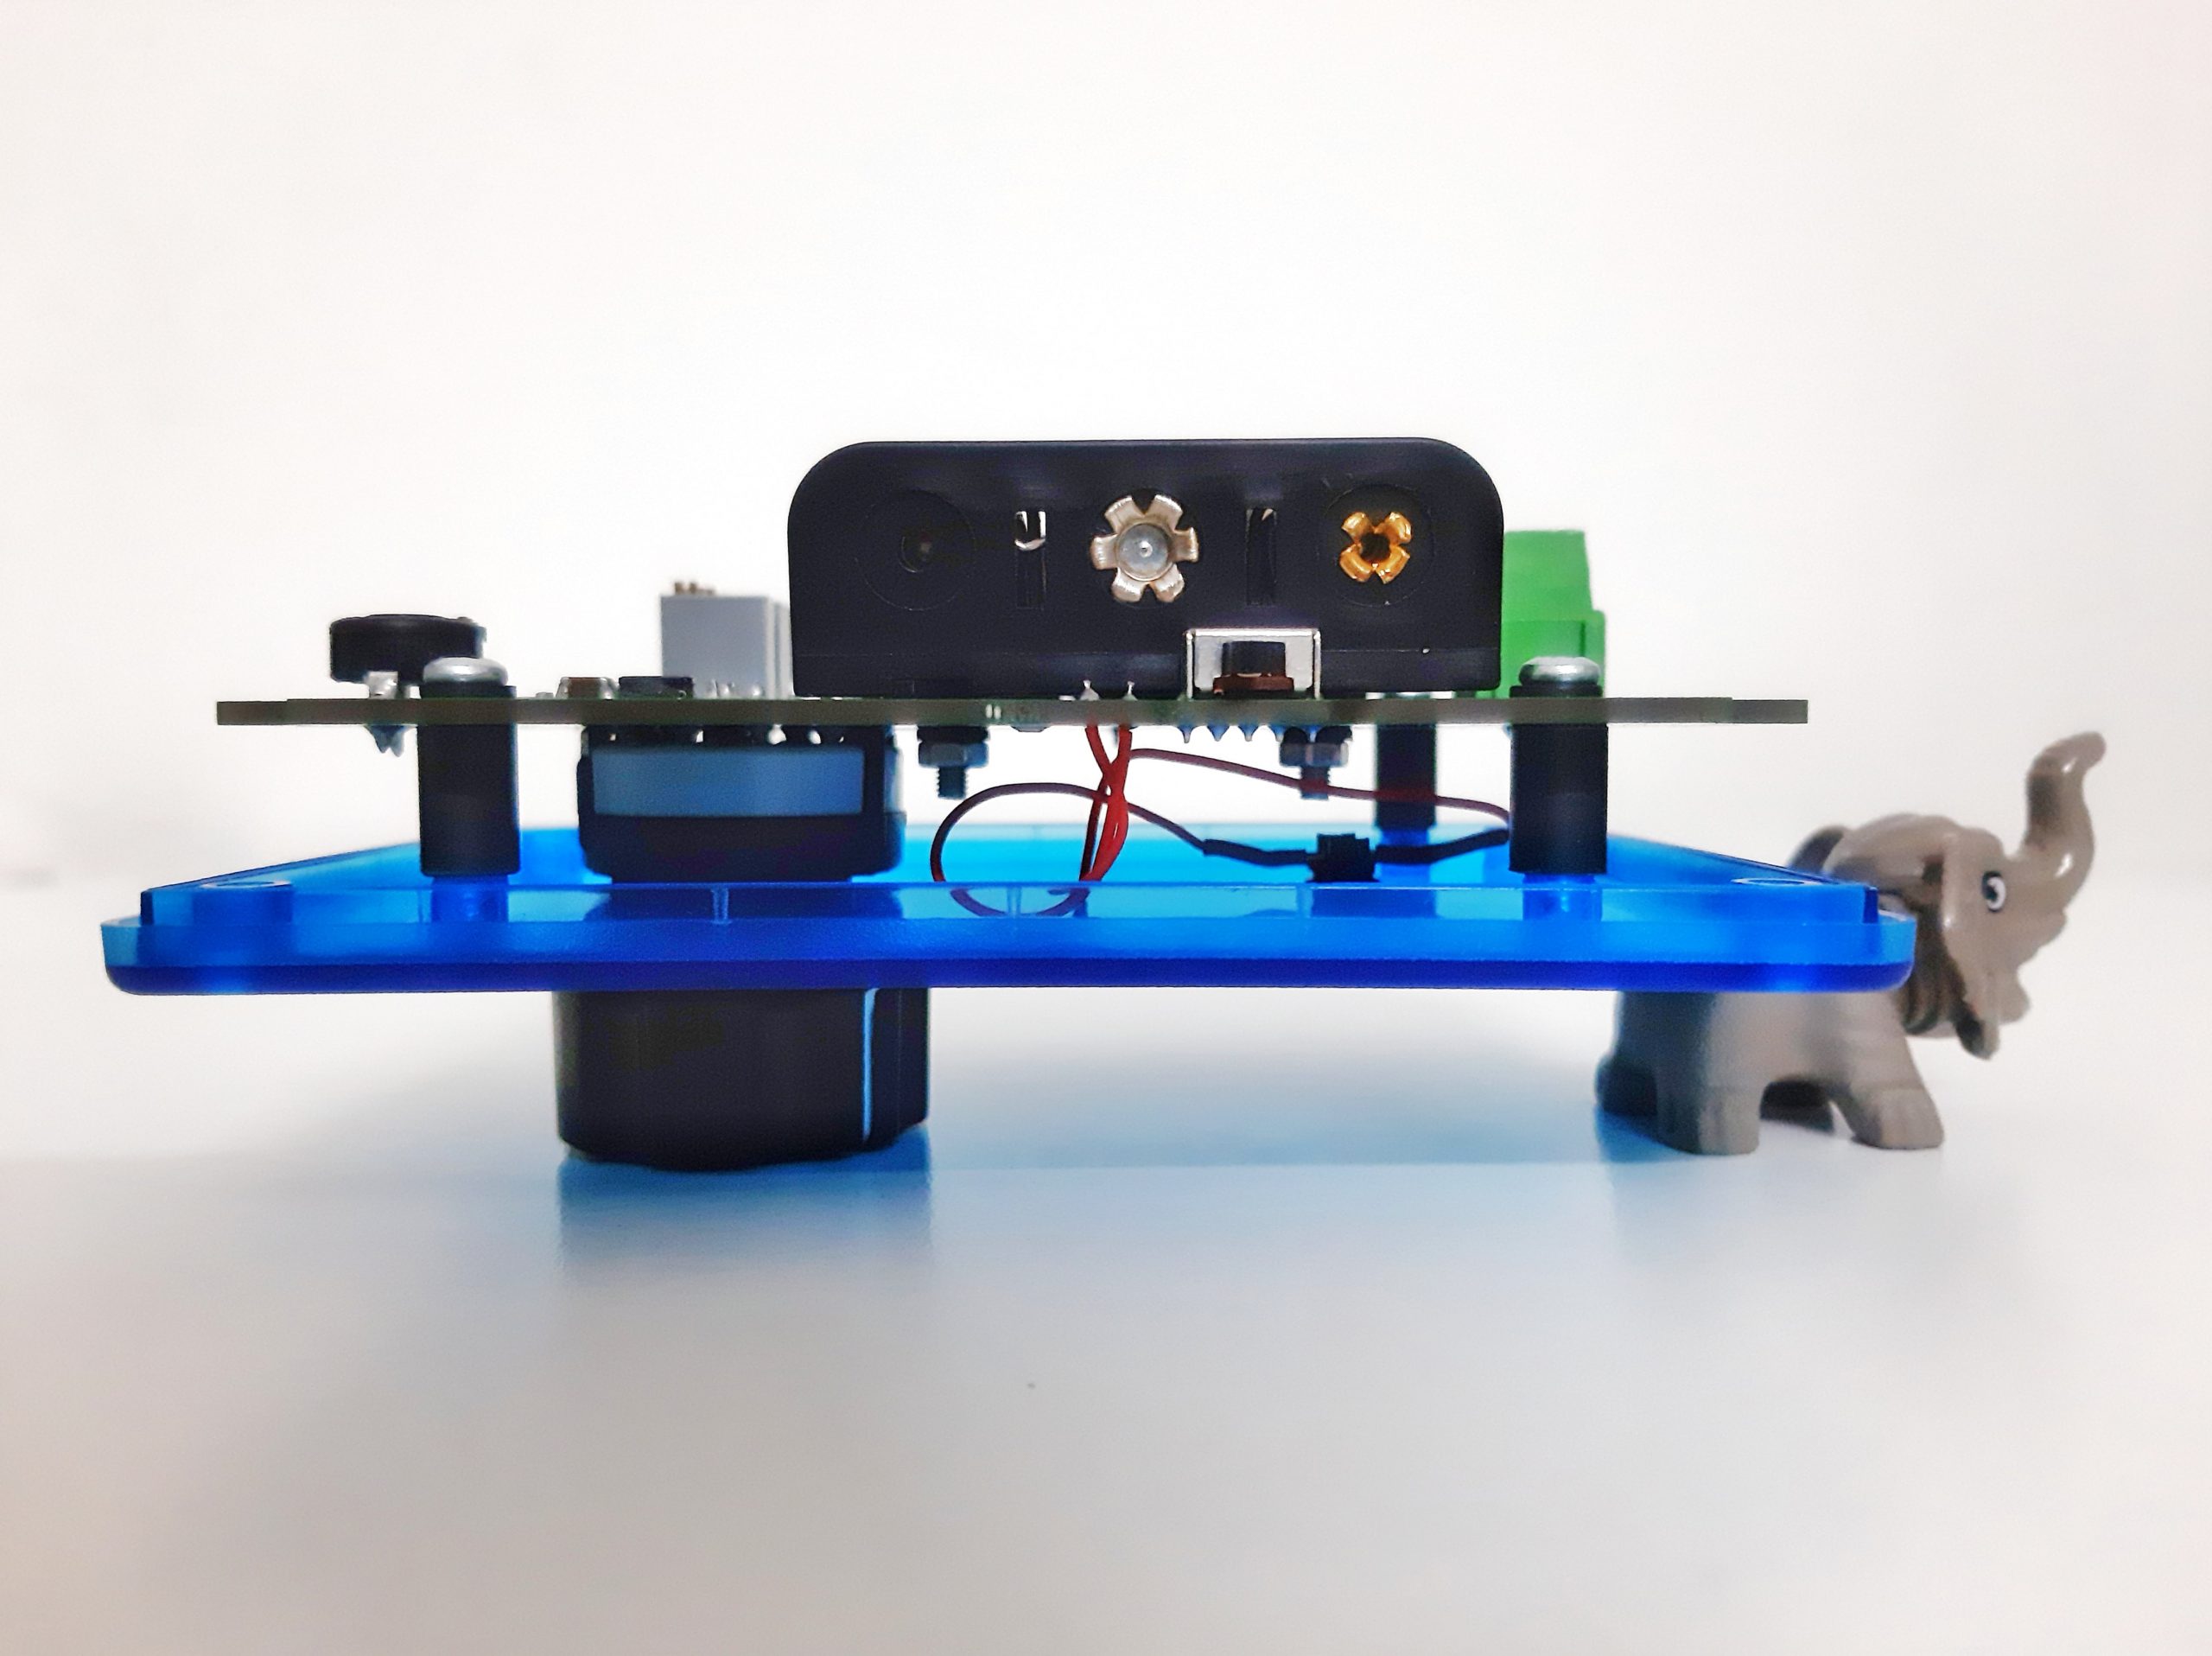
Let’s talk about the design of the product. I wanted the Precision Current Source to be easy to open, modify and calibrate. So the PCB is designed to be mounted on the top half of the enclosure. And everything is mounted on the PCB. Hence when you open the case, the PCB comes out with it making it more accessible. On the same theme, the enclosure I chose has threaded metal inserts and is translucent. The idea one could see the artwork on the PCB, but it didn’t turn out that way. None the less the whole device still looks beautiful and feels sturdy in hand. The three AA cells give it a necessary heft, and the tactile feel of the knob adds to its user experience. The design is intentionally clean and intuitive.
Assembly
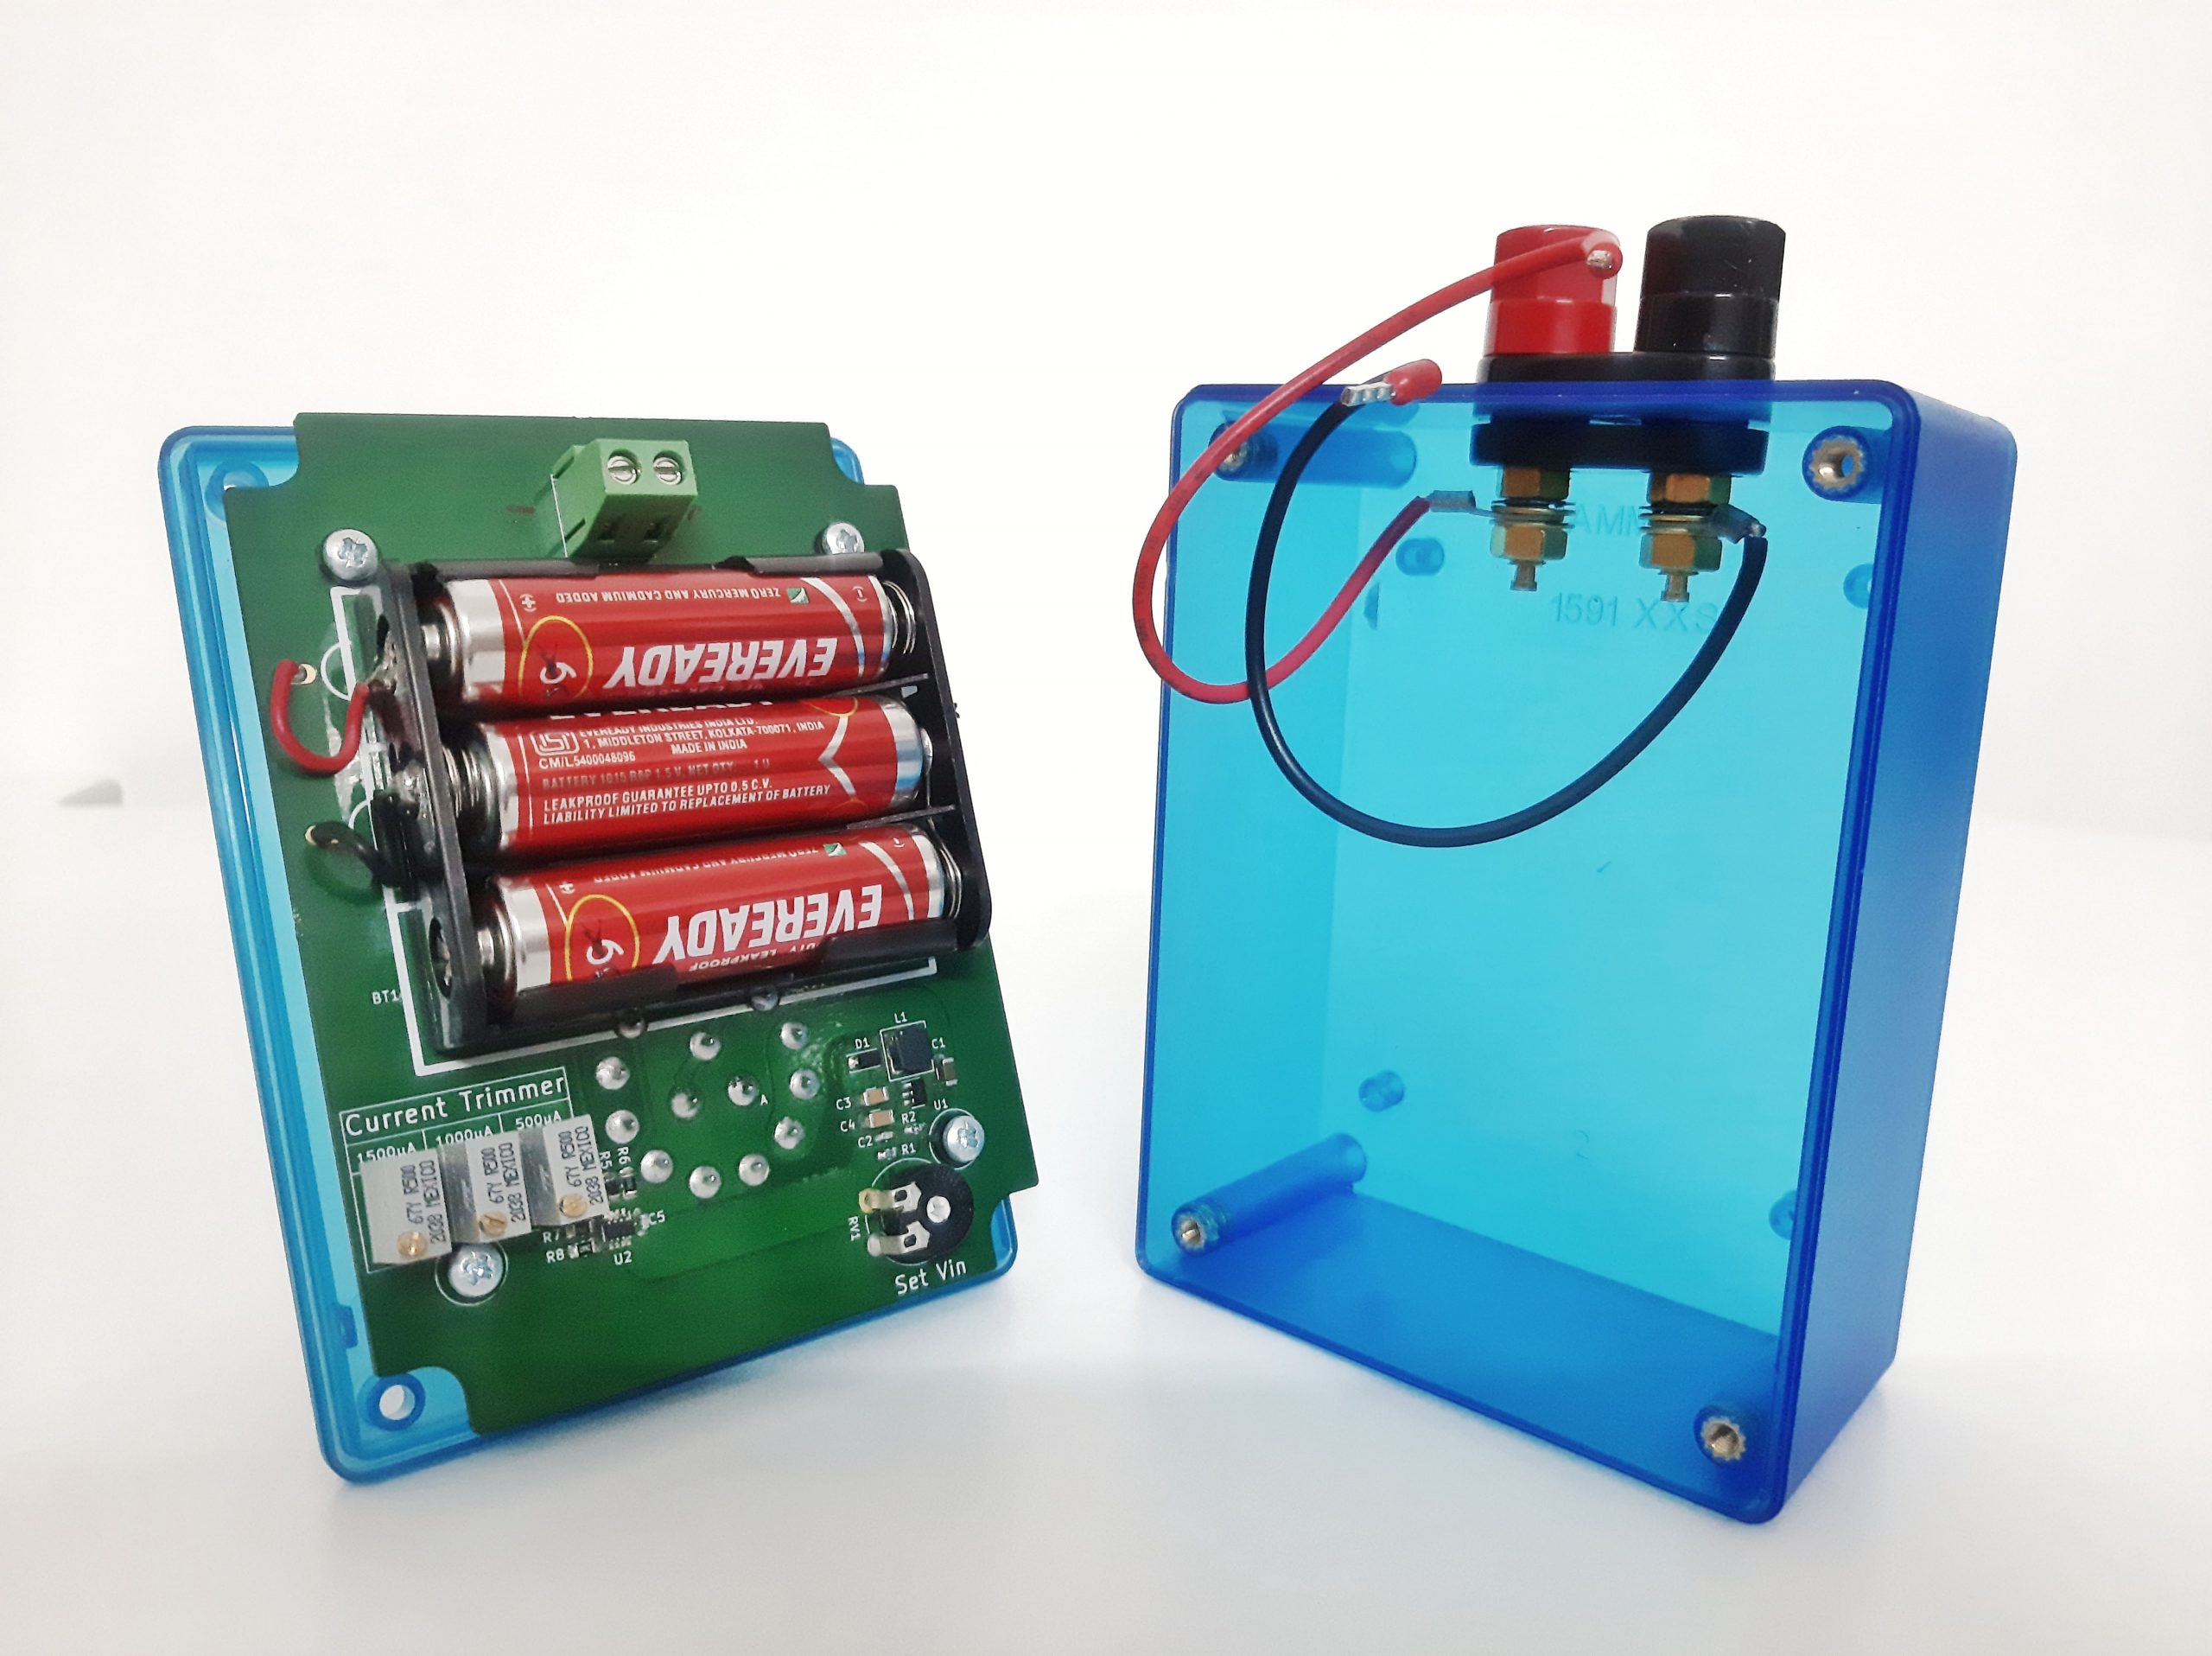
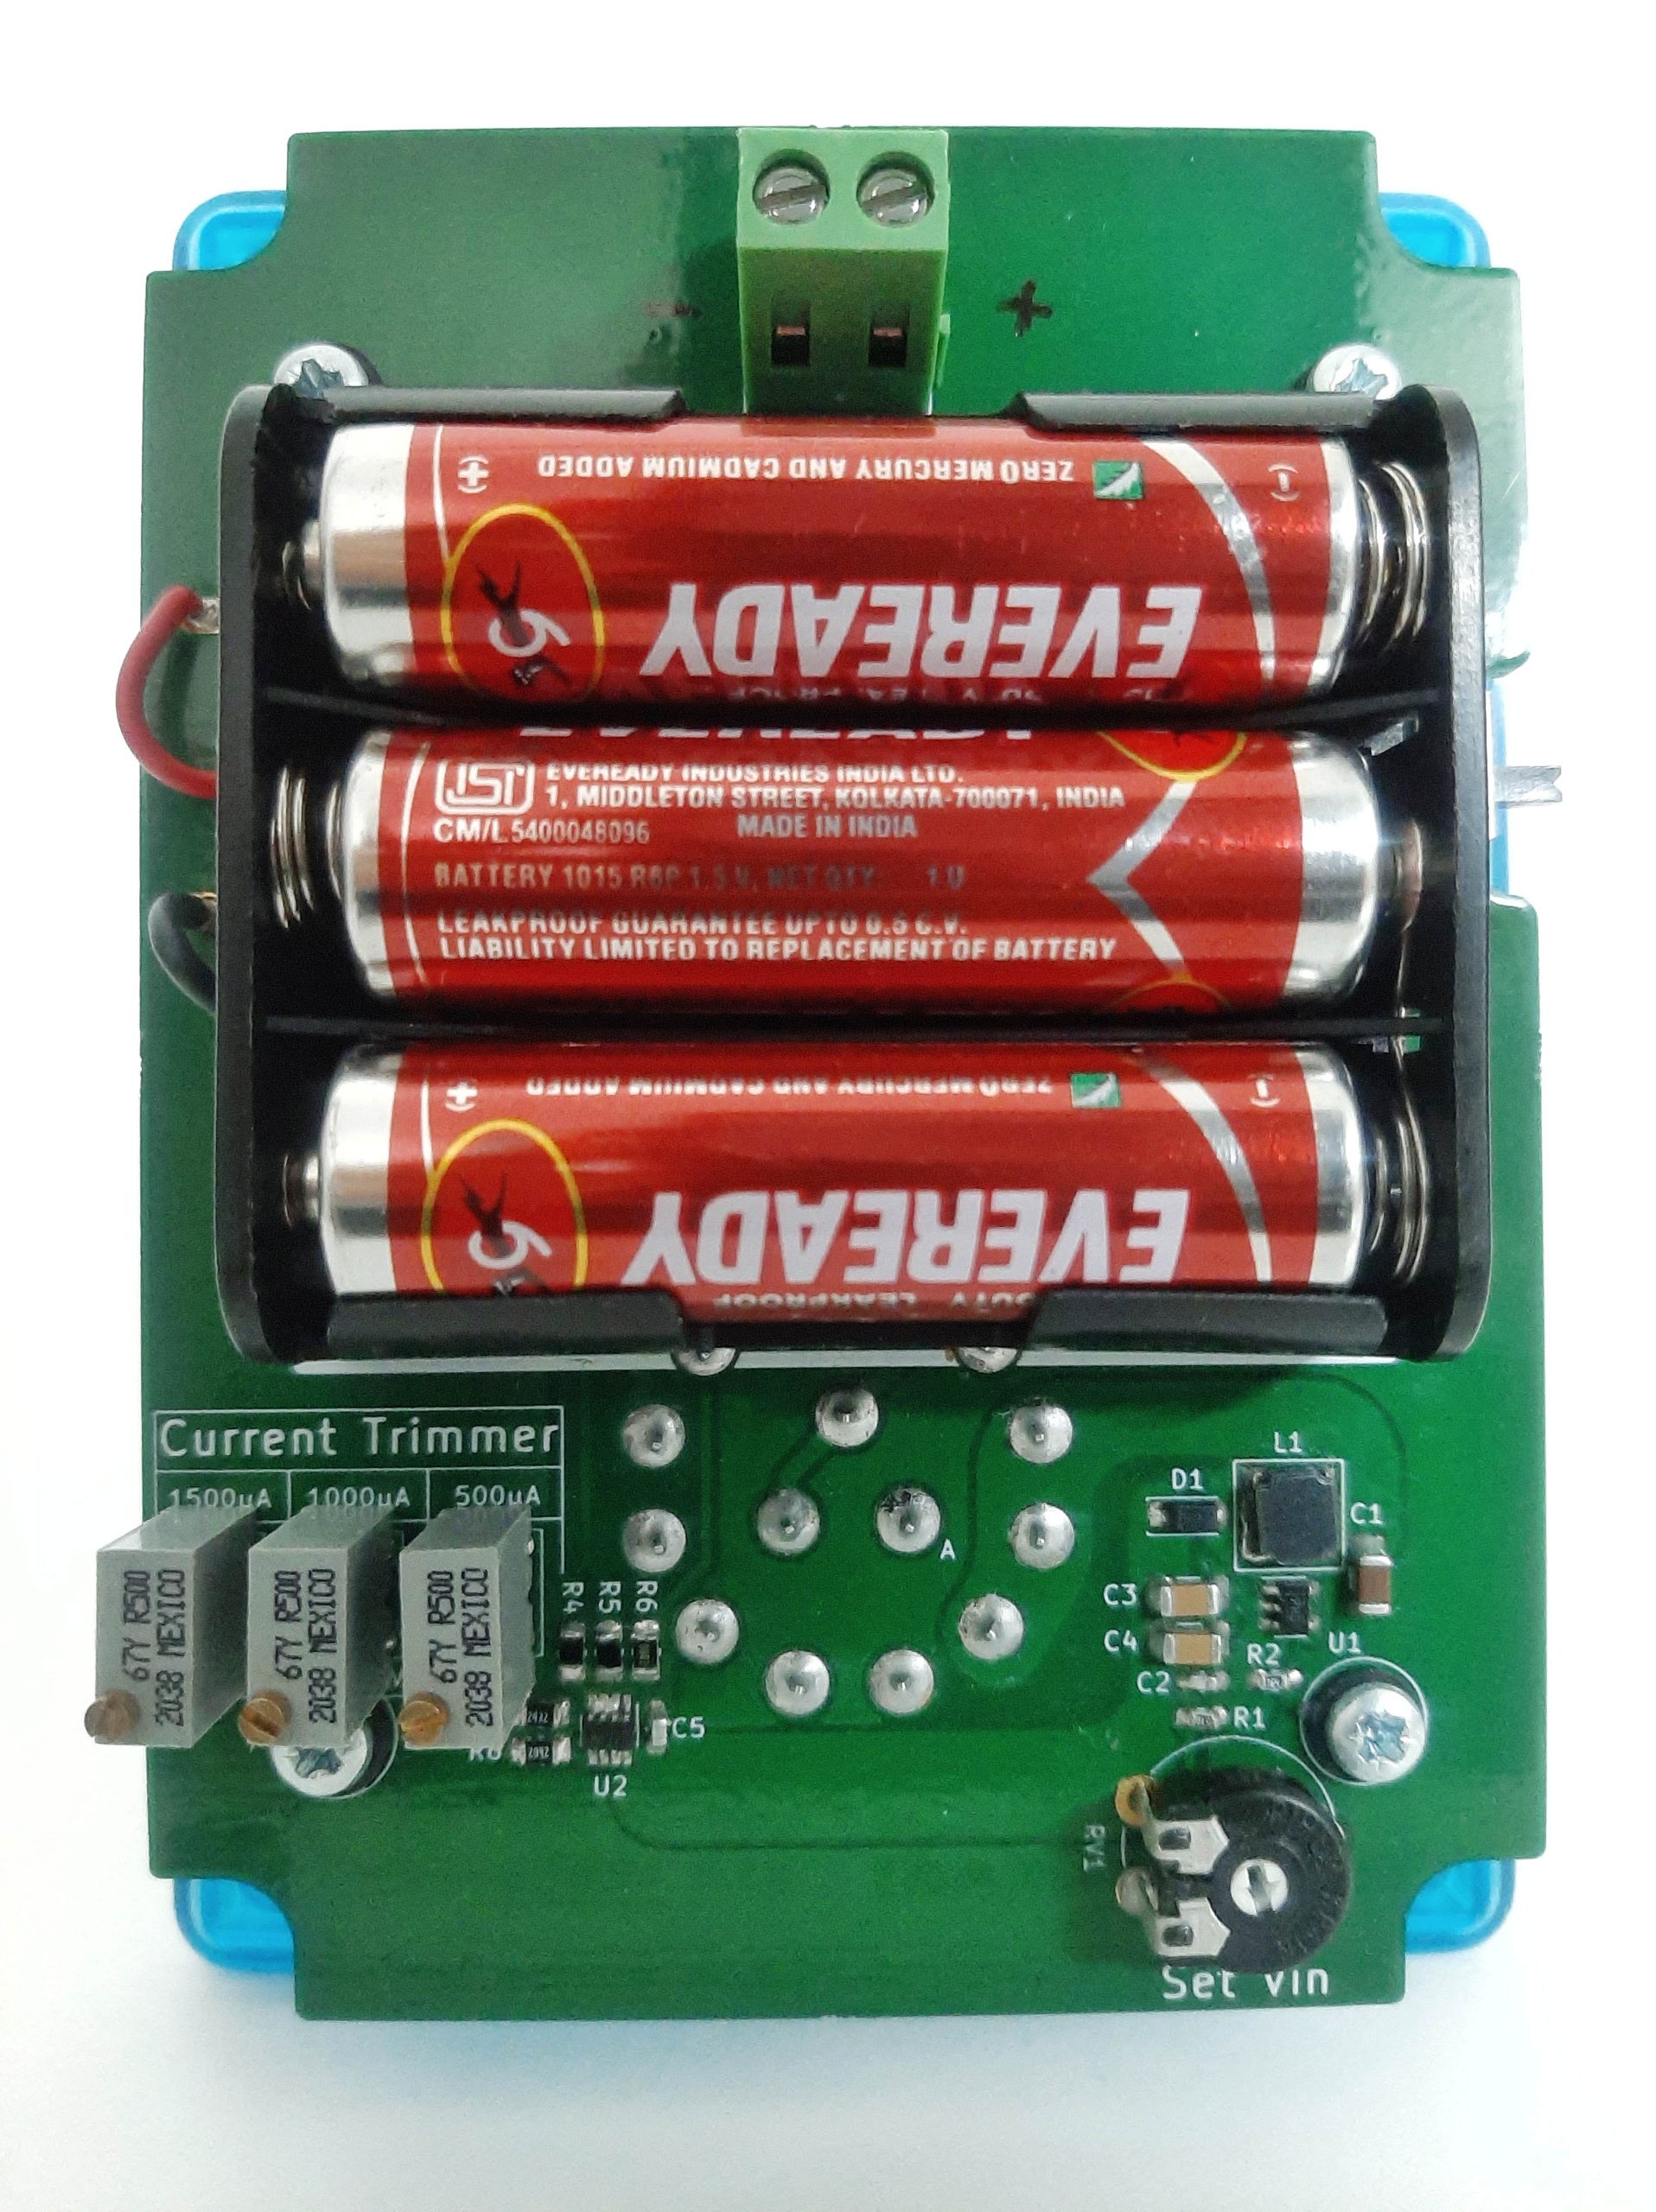
Initially, the SMD components on the PCB are mounted, and then the smaller through-hole components. The switch and the battery holder go last. Interestingly the battery holder has a tab to be solder a wire. But the plastic of the holder melts within seconds. I need to find a better way to work with it. The battery holder is blotted on the PCB using two bolts & nuts with spacers to avoid a short circuit. Apart from that, we have a front-face-mounted LED and a knob. Assembled PCB is then mounted using self-tapping screws and standoffs to support the PCB. There is one screw terminal at the top for wires connecting them to the binding posts.
Binding posts are the only thing mounted on the other half of the enclosure. I could have mounted them on the front face, but it wouldn’t have looked as good. Also, the overall form factor didn’t allow it. But would have made the device self-contained at the lid.
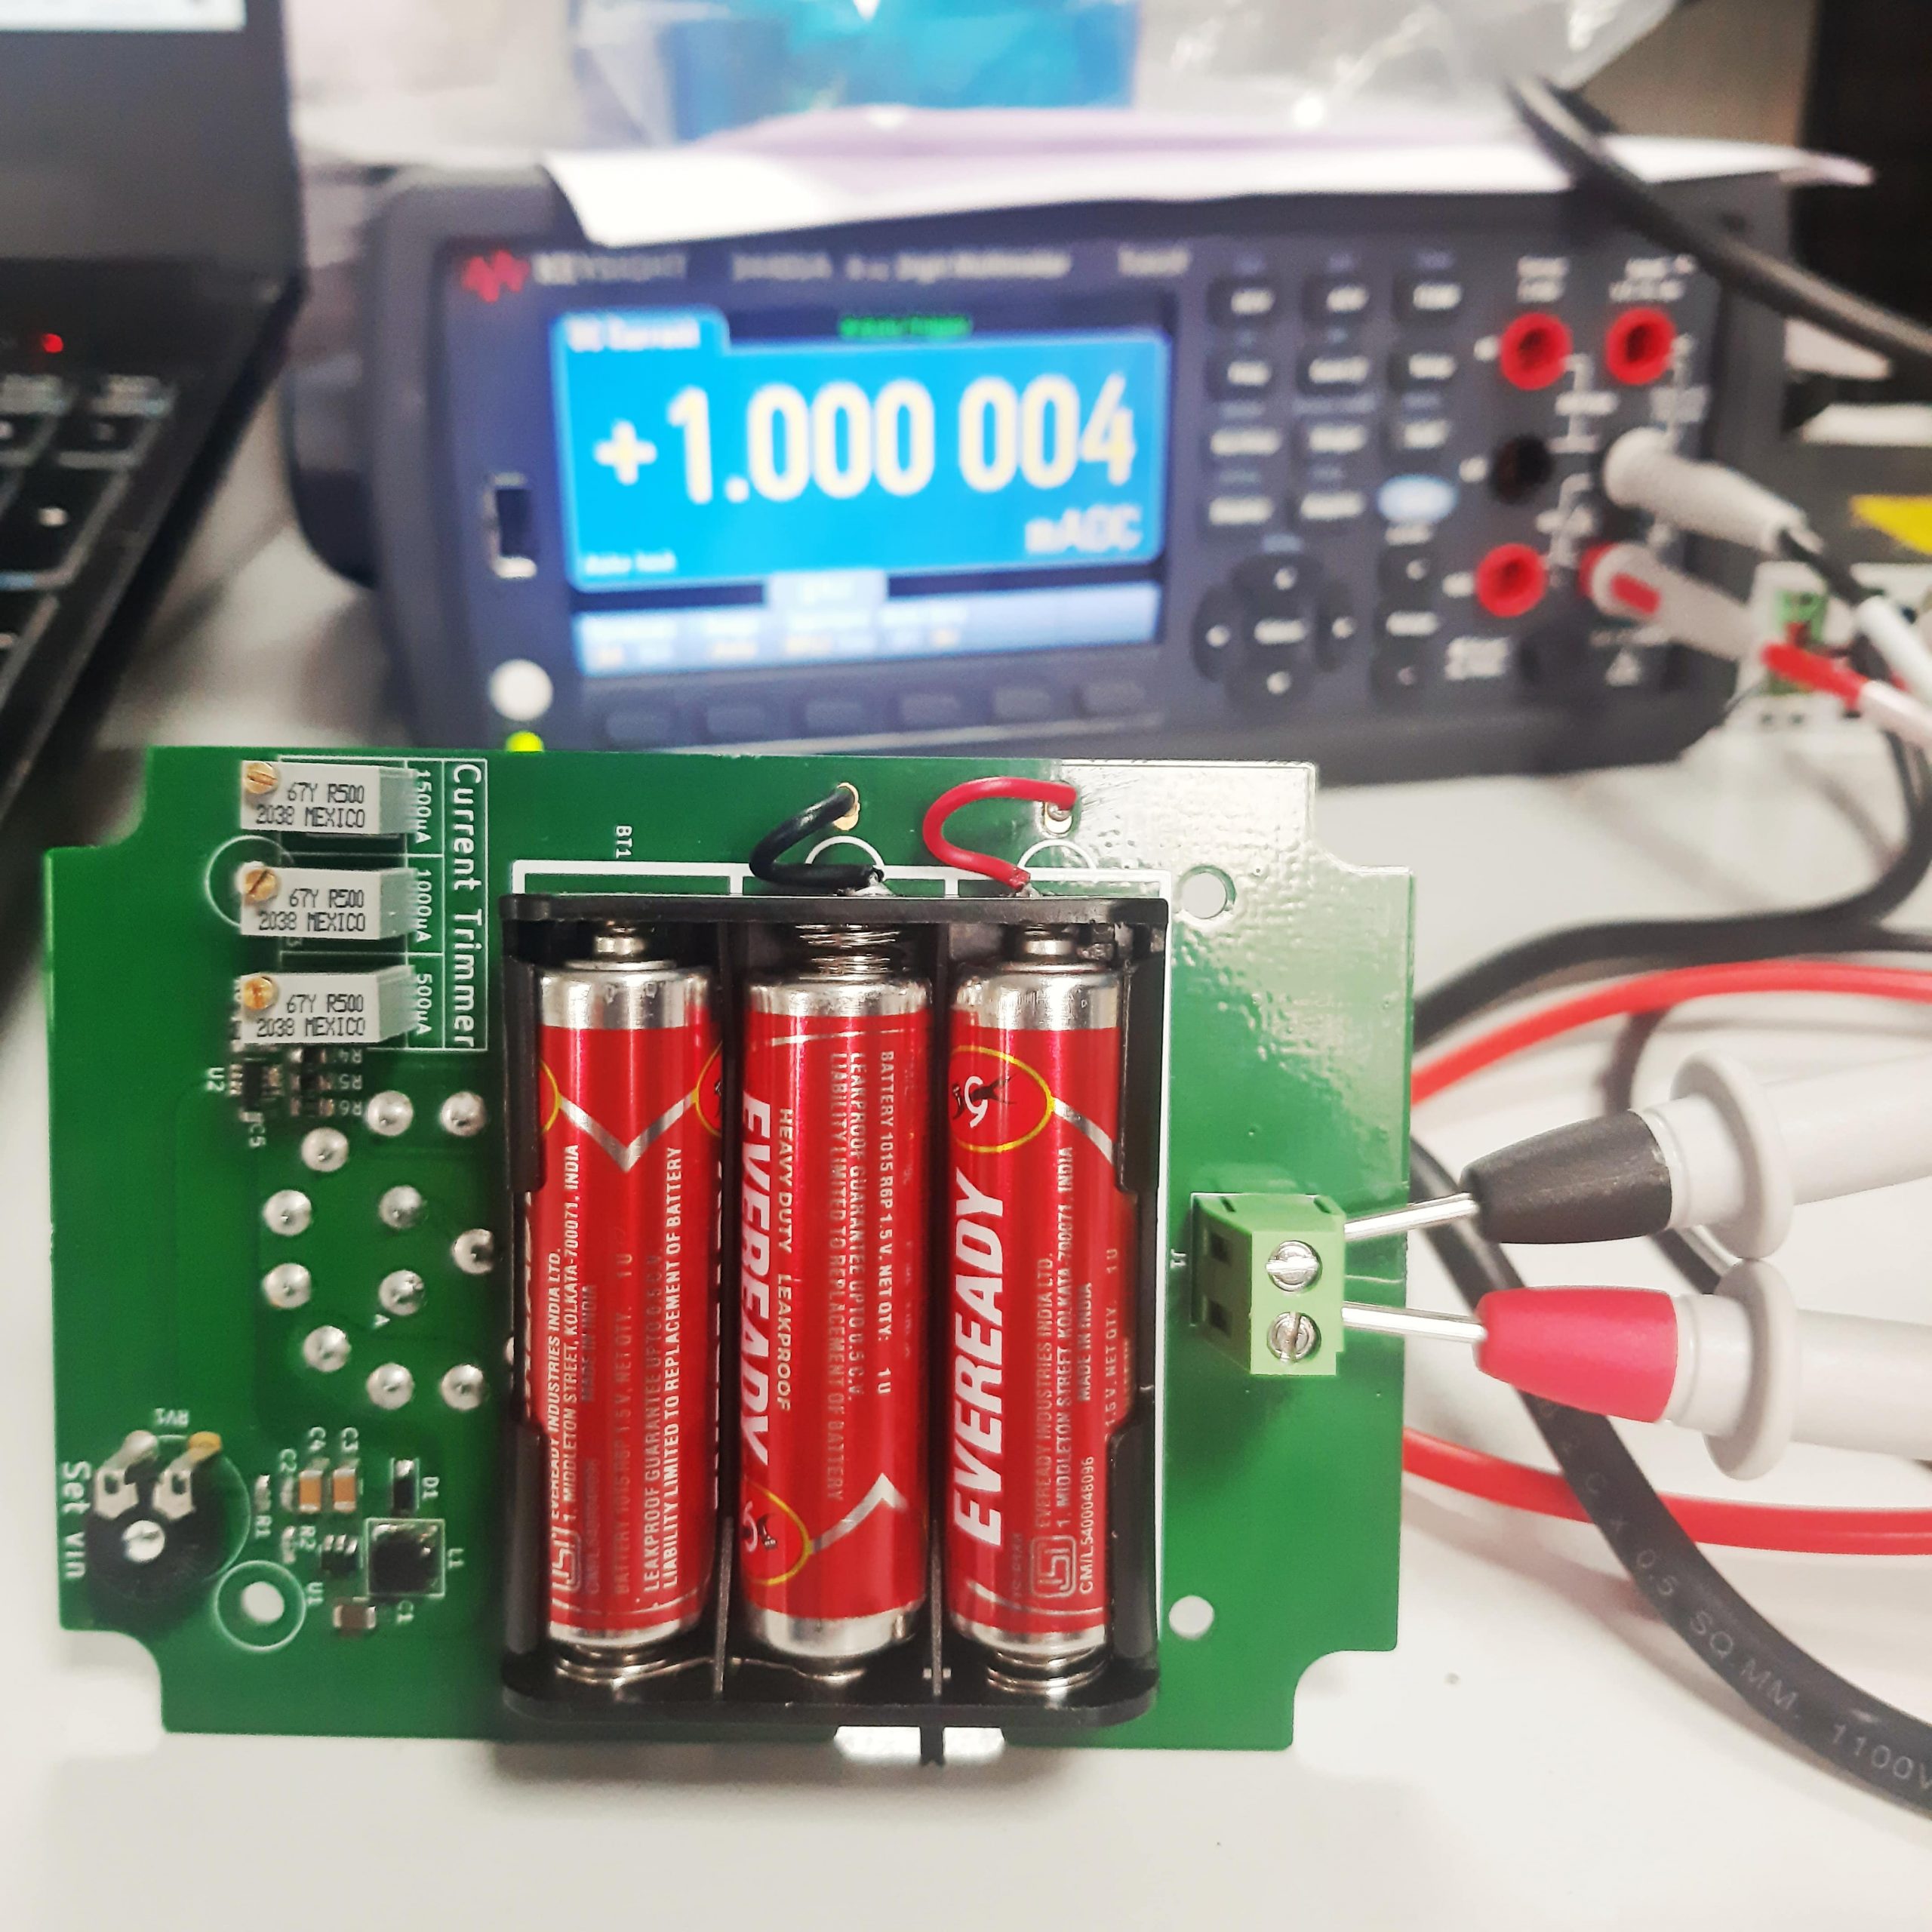
Calibration
Calibrating the device is effortless. After opening the device, you will find three trim pots on the bottom side of the PCB, one for each range. While connected to a precision current measuring device, you need to trim the appropriate trimmers for the selected range till you get the expected value on the measuring device. And that’s it!
Improvements and known issue
One thing that is pending about the device is the range markings for the knob. I am learning Inkscape for the same, so that is coming soon.
Apart from that, for some reason, the 1.5mA range doesn’t go above the 1.499mA. I have checked the calculations, but I am still not sure about the exact cause. I have few theories, but confirming it is going to take few parts. So, I am planning to do it when I have a component order for the next project. Till then, 1.499mA will have to do. Please comment below if you find the issue.
Apart from that, the schematics are attached here.
Other posts from the Precision Current Source series:
- Precision Current Source: Part One where we discussed the need for a precision current source and defined its features
- In Precision Current Source: Part Two where we discussed how to improve systems temperature drift by minimizing potentiometer temperature drift
- Precision Current Source: Part Three we finally see the device working, with its specification and design considerations
